Rubber fenders for boats protect hulls and quays by absorbing energy through elastic deformation. However, they still fail when sliding abrasion, shear loading, or overload events occur. Weak hardware can also concentrate stress into small zones. Preventing damage during berthing relies on controlled contact, safe handling, and verified structural support. This guide focuses on verifiable actions during approach, contact, storage, and inspection.
Identifying Fender Damage and Warning Signs
Prevention becomes predictable when teams classify damage by cause rather than just appearance. We separate abrasion, shear, overload, connection failures, and aging. Each category has a different root cause and fix. Correct classification prevents cosmetic repairs when the underlying force remains unresolved.
- Abrasion damage: Appears as scuffing, polishing, or material loss in the contact band. It accelerates when debris or rough panels create a grinding surface. Check if the vessel slides along the berth face during approach or hold. Recurring sliding usually drives the wear rate.
- Shear damage: Looks like diagonal cracks, tearing near edges, or splitting near mounting lines. This increases when a vessel approaches at a poor angle or “walks” along the berth. Verify approach alignment and contact direction. Shear cycles often destroy rubber faster than simple compression.
- Overload damage: Involves deep cracking, permanent deformation, or a loss of shape recovery. Risk depends on operating conditions, not just vessel size. Verify incident history and contact point behavior before labeling a fender as “under-designed.”
- Connection failures: Show up as tearing near fittings, loose fasteners, or panel deformation. Corrosion reduces load distribution, concentrating stress into the rubber body. Check the full load path from rubber to backing structure. A sound rubber body can still fail within a weak assembly.
- Environmental aging: Appears as surface checking, hardening, and reduced resilience. UV rays, temperature changes, and chemicals weaken rubber compounds. Verify exposure sources and cleaning chemistry. Generic cleaning methods are often unreliable.
Observable sign on site | Most likely driver to suspect | What to verify next at the berth |
|---|---|---|
Uniform scuffing and material loss | Sliding abrasion | Check approach control and hull sliding during hold |
Diagonal cracks or edge tearing | Shear loading | Check approach angle and vessel “walking” behavior |
Deep cracking or deformation | Overload or high-energy contact | Check abnormal events and procedure adherence |
Tearing near bolts or fittings | Connection weakness | Check for looseness, corrosion, and alignment |
Surface checking and hardening | Environmental aging | Check sunlight exposure and cleaning chemicals |
Common Misconceptions About Fender Wear
Prevention fails when crews rely on simple assumptions that ignore mechanics. We correct these misconceptions early to stop repeat damage. Replace assumptions with quick checks that link damage to root causes.
- “Thicker rubber always lasts longer.” This shortcut misses the real failure driver. Service life depends on matching the fender type to the berth’s contact behavior. Verify contact direction and hardware condition before recommending a change.
- “Only one big impact causes damage.” This ignores cumulative wear. Many small sliding contacts during a hold remove material faster than one controlled compression. Verify if movement during the hold is recurring.
- “If there is no visible crack, it is fine.” This overlooks hardware failures. Loose bolts and corroded chains overload small rubber zones before cracks appear. Verify hardware and panel positions during every inspection.
- “Cleaning is just cosmetic.” Debris and growth play a huge role in abrasion. Abrasive particles turn normal contact into grinding. Verify that cleaning removes abrasive sources without using incompatible chemicals.
Fender Types and Specific Use Risks
Prevention must adapt to the rubber fender type. Each design fails differently under similar conditions. We compare damage triggers for pneumatic, molded, and extruded fenders.
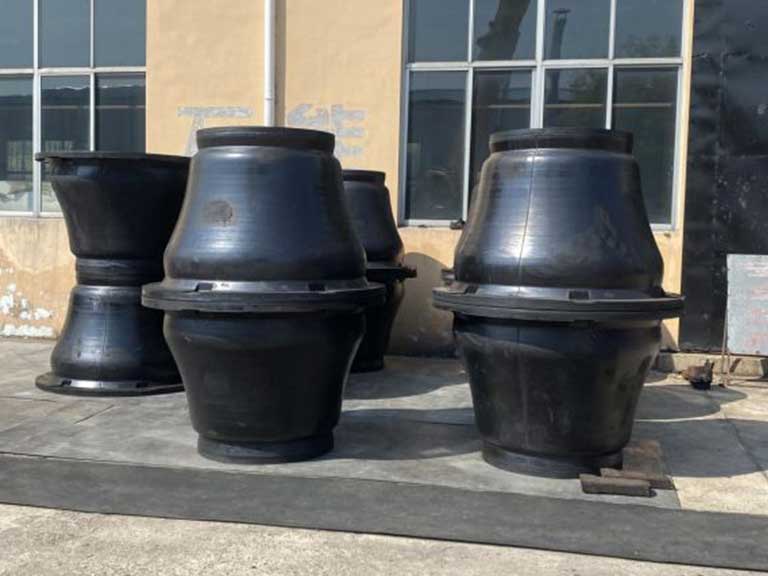
Pneumatic Fenders: High-Energy Contact Risks
Pneumatic fender prevention depends on protecting abrasion points and verifying integrity. These fenders suit high-energy berthing, but they suffer damage when securing methods create rubbing.
Rope and chain contact points create abrasion grooves that grow quickly. Verify abrasion marks around securing interfaces. Protect these areas to prevent sawing motions. Pressure integrity also needs documented checks. Abnormal shapes or valve damage are warning signs. Verify valve protection and leak indicators before service.

Molded Fenders: Fixed Quay Impact Risks
Molded fenders on quay walls face repeated contact in defined zones. They are vulnerable when vessels approach at poor angles. Edge tearing often starts near stress concentrations. Verify approach alignment and first contact behavior. Correcting the contact pattern slows crack growth better than surface repairs.
Hardware integrity is critical here. Looseness shifts the load into small rubber regions. Verify fasteners and panel seating so the system carries the load as intended.
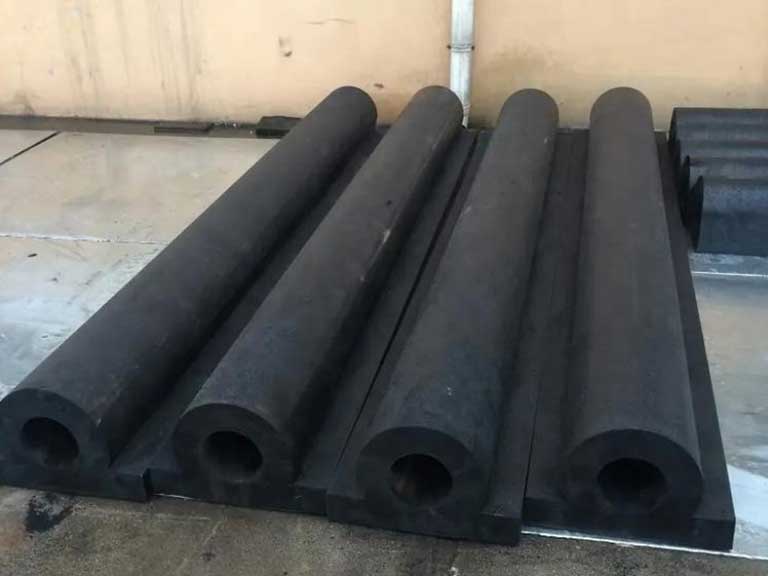
Extruded Fenders: Continuous Rubbing Risks
Extruded profiles are used for moderate loads. They degrade quickly if support surfaces are uneven. Uneven support creates high spots that carry too much load. Verify flush seating and check for gaps along the installation line.
Continuous rubbing indicates that the mooring allows drift. This produces wear bands that look normal until rapid material loss occurs. Verify vessel stability and adjust operational control.
Berthing Practices to Prevent Damage
Operational discipline is the fastest way to reduce repeat damage. We focus on approach angle, controlled contact, and stable holds.
- Approach angle control: Reduces shear. It prevents the hull from dragging across the fender face. Poor alignment produces diagonal cracking. Verify approach behavior and adjust procedures for local currents.
- Approach speed management: Reduces shock loading. Speed guidance depends on the vessel and weather. Verify if wind or current increases relative motion and adapt the plan.
- First contact point selection: Avoids edges and fittings. A small change in the contact point can move the load to a safer zone. Verify that crews target intended contact zones.
- Berthing hold stability: Reduces micro-movements. Poor mooring control causes drift-driven rubbing. Verify line management practices to reduce oscillation.
Berth-Side Verification Checklist:
- Verify the contact zone is clear of debris and sharp edges.
- Verify that the approach plan minimizes sliding along the berth.
- Verify first contact avoids fittings, corners, or panel edges.
- Verify mooring control stabilizes the vessel against drift.
- Verify abnormal conditions are recorded to trigger inspections.

Managing Handling, Storage, and Inspection
Damage often happens outside of berthing operations. We see avoidable issues caused by poor hoisting or storage environments. A system-level plan treats handling, storage, and inspection as one chain.
Handling Controls to Prevent Cuts
Lifting methods that pinch or cut will concentrate loads. Metal hooks and wire ropes initiate cuts that grow under compression. Verify that lifting uses suitable slings. Protect valve and fitting areas from impact.
Transport damage occurs when fenders rub against rough surfaces. Movement during transport creates deep abrasion grooves. Verify that fenders are secured and padded against shifting.
Storage Controls to Reduce Aging
Storage conditions influence aging and shape retention. Sunlight, heat, and chemicals accelerate hardening. Verify that storage is dry, shaded, and ventilated.
Chemical exposure risk is site-specific. Oils and solvents are common compatibility risks. Verify chemical segregation and cleaning chemistry.
Storage Control Checklist:
- Store fenders away from direct sunlight and heat.
- Separate fenders from oils, solvents, acids, and alkalis.
- Prevent sharp contact points and avoid stacking that distorts the shape.
- Protect valves and rope contact zones from abrasion.
Hardware Checks and Load Paths
Hardware issues convert normal loads into rubber stress. Loose fasteners and corroded chains reduce load distribution. Verify the fastening condition and panel alignment together.
Panel condition matters. Damaged panels introduce rough surfaces. Debris trapped behind panels can shift alignment. Verify panel position and remove trapped materials.
Inspection Rhythm and Repair Decisions
Inspections should be staged by operating intensity. Fixed calendar intervals do not fit every berth. Verify inspection rhythm using observed wear and incident records.
Inspection Stages:
- Commissioning: After installation. Verify seating and alignment.
- Routine: Normal operations. Verify wear bands and loose hardware.
- Periodic: Higher exposure. Verify load path and damage growth.
- Event-Driven: Abnormal contact. Verify overload signs and tearing.
Repair decisions must correct the root cause. Surface abrasion is manageable if the sliding is stopped. Verify that operational corrections happen before repairing the surface.
Replacement rubber fender is necessary when structural integrity fails. Deep cracking or tearing near mounting points requires assessment. Verify progression risk before returning a fender to service.
Conclusion
Prevention is most reliable when terminals combine contact control, safe handling, and verified inspection. We recommend classifying damage by mechanism and correcting myths that drive sliding. Apply type-specific checks for pneumatic, molded, and extruded systems. A prevention program becomes sustainable when every repair includes a verified root-cause correction.
FAQ
Damage usually results from sliding abrasion, shear loading, overload, or weak connections. Sliding and shear increase when the approach alignment or hold stability is uncontrolled. Verify contact behavior first, as surface appearance can be misleading.
Look for changes in the contact band, new edge tearing, deformation, or loose hardware. Small damage accelerates if the underlying mechanism continues. Verify if wear progression is stable or growing between checks.
Direct sunlight, heat, poor ventilation, and chemical contact accelerate aging. Oils and solvents are common risks. Verify storage segregation against site-specific chemicals.
Frequency depends on traffic and exposure. High-use berths need more frequent checks than sheltered ones. Verify inspection rhythm by tracking damage progression and recording abnormal events.
Repair superficial damage if the root cause is fixed. Replace if structural integrity is compromised. Deep cracking or tearing near mounts requires assessment. Verify system condition before returning equipment to duty.