Installing pneumatic fenders is essential for ensuring the safety of ships and docks. Proper installation maximizes the fender’s effectiveness and significantly extends its lifespan. Henger provides detailed instructions on how to properly install pneumatic fenders in this guide. It includes specific details on step-by-step procedures, tools, and best practices.
What is a Pneumatic Fender?
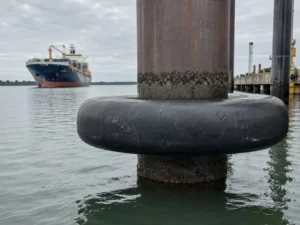
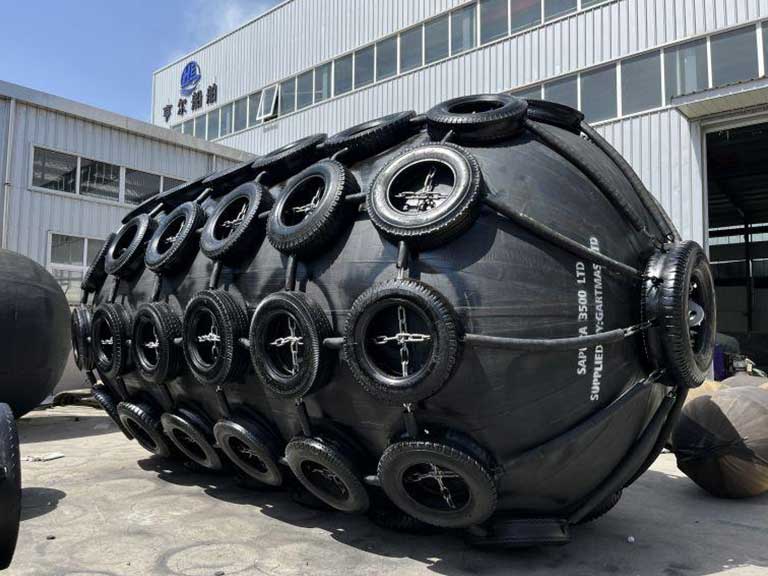
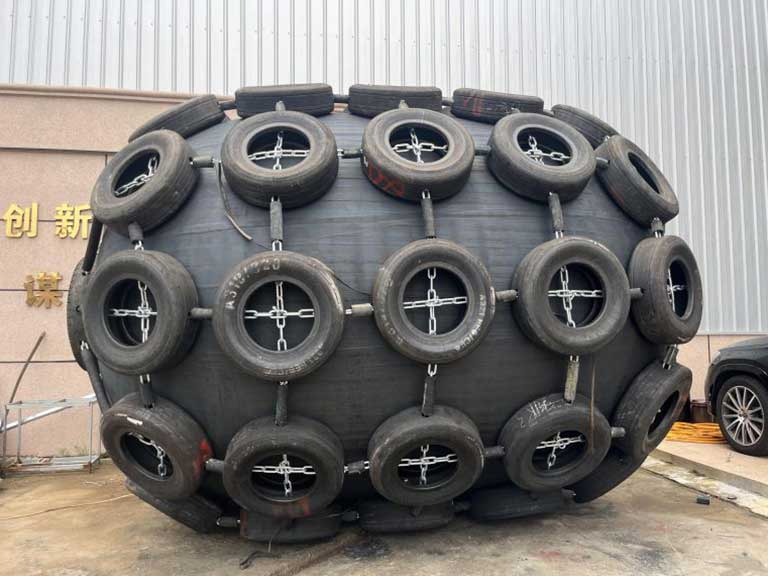
Pneumatic fender, also known as Yokohama fenders, is a kind of buffer device used between ships and wharves. This kind of fender forms an elastic airbag by inflating. The airbag can effectively absorb and disperse the impact of the ship when berthing, while preventing damage to the ship and the pier.
Henger’s inflatable fenders consist of a high-strength rubber shell, an internal airbag, and auxiliary accessories such as chains and tire nets. The fender shell is made of abrasion- and corrosion-resistant rubber. The internal air bladder is filled with air or other gases to provide elasticity. Chains and tire nets hold the fender in place and provide additional protection. Proper installation is critical to the performance and longevity of the fender. This is because it ensures that it effectively absorbs impact during berthing.
Preparation Before Installation
Necessary Tools and Equipment
Before installing pneumatic fenders, it’s important to prepare the right tools and equipment. Here’s a list of what you’ll need:
- Inflation pump: Ensures stable air pressure for the fender.
- Pressure gauge: Monitors and adjusts the air pressure inside the fender.
- Ropes and cables: Secure the fender, ensuring stability.
- Lifting equipment: Such as cranes or forklifts, is used to handle and install the fender.
- Leak detection tools: Like soapy water, to check for air leaks.
- Wrenches and screwdrivers: Used to tighten the fender’s connections.

Required Safety Equipment
Safety is a top priority during the installation of pneumatic fenders. The following safety equipment is recommended:
- Safety helmet: Protects against head injuries.
- Safety gloves: Protect hands from cuts and abrasions.
- Safety shoes: Provide foot protection against heavy objects.
- Life jacket: Essential when working on docks or near the ship to prevent drowning.
- Protective goggles: Protect eyes from splashes.
Preparation of the Installation Site
Before installing the pneumatic fender, make sure the installation site is properly prepared:
- Site cleaning: Ensure the area is free of debris for easy operation.
- Area marking: Define the installation area and ensure no unauthorized personnel are within the safety zone.
- Equipment inspection: Pre-check lifting equipment, inflation pumps, etc., to ensure they are functioning properly.
- Weather assessment: Confirm favorable weather conditions during the installation period to avoid delays.
- Personnel arrangement: Assign experienced technicians for the installation and clearly define roles.

Safety Considerations During Installation
Importance of Safety During Installation
Installing inflatable fenders involves a few steps: lifting, inflating, and securing. These operations are potentially dangerous. Ensuring safety protects the lives and health of installers. It also prevents equipment damage and installation delays, and improves overall operational efficiency. Strict adherence to safety regulations and measures is therefore essential.
Safety Measures
- Wear personal protective equipment: All personnel must wear safety helmets, gloves, shoes, life jackets, and protective goggles.
- Safety training: Ensure all installation personnel are trained in safety protocols and emergency procedures.
- Equipment inspection: Conduct thorough inspections of lifting equipment, inflation pumps, and tools before use.
- Site monitoring: Assign safety personnel to monitor the site and address potential hazards promptly.
Common Hazards and How to Avoid Them
- Lifting equipment failure: Regularly maintain lifting equipment and avoid overloading.
- Overpressure leading to fender burst: Monitor inflation with a pressure gauge to avoid over-inflation.
- Slips or falls: Keep the site tidy and lay anti-slip mats in slippery areas.
- Falling heavy objects: Ensure lifting equipment hooks and ropes are secure.

Step-by-Step Installation Guide
Step 1: Site Inspection and Preparation
Before installing the pneumatic fender, inspect the site to ensure it’s suitable:
- Inspect the site: Confirm the area’s dimensions and environment meet the fender’s specifications.
- Clean and prepare the area: Make sure the installation point is free of oil stains, and rust, and is level.
Step 2: Positioning the Pneumatic Fender
Correct positioning of the fender is essential for its effectiveness:
- Position the fender: Determine the installation height and location based on the fender’s design and the structure of the dock or ship.
- Ensure alignment: Use a level and measuring tools to ensure the fender is horizontal.
- Use markings: Mark the installation point and alignment lines on the site.
Step 3: Securing the Fender
Secure the pneumatic fender using chains, ropes, or steel cables:
- Install the fender: Use high-strength chains or steel cables to secure the fender to the dock or ship, tightening gradually to ensure it’s firmly attached.
- Check stability and safety: Ensure all connections are tight and secure.
Step 4: Fender Inflation
It is important to know how to properly inflate a pneumatic fender:
- Inflation technique: Use appropriate equipment (electric or manual pumps) and inflate slowly.
- Recommended pressure level: Inflate to the manufacturer’s recommended pressure level, usually between 0.05 to 0.08 MPa. Consult the product manual for specific guidelines.
- Inflation tools and equipment: Use a high-precision pressure gauge for real-time monitoring.
Step 5: Final Inspection
After installing the pneumatic fender, conduct a thorough inspection:
- Check installation points: Ensure all connections are secure.
- Ensure accessory safety: Inspect chains, ropes, and fasteners.
- Check inflation and alignment: Confirm the fender’s air pressure and alignment.
Post-Installation Maintenance
Routine Inspection
Routine inspections can identify possible problems with pneumatic fenders in a timely manner. This facilitates the timely identification and resolution of problems:
- Inspection frequency: Conduct a comprehensive inspection monthly, with extra checks after severe weather.
- Inspection content: Check the fender surface, securing chains, ropes, and air pressure for any wear or looseness.
Cleaning and Maintenance
It is important to understand how to clean and maintain your pneumatic fender. This can extend its lifespan:
- Recommended cleaning methods: Rinse the fender surface with clean water to remove salt and dirt.
- Cleaning tools: Use a soft brush or sponge, avoiding hard brushes or high-pressure water.
- Damage prevention tips: Avoid strong acids or alkalis that could damage the fender surface.
Repair and Replacement
Regular inspection and repair ensure the proper use of pneumatic fenders:
- When to repair or replace: Repair or replace the fender when significant damage occurs or when it cannot maintain air pressure.
- Common repair techniques: Use repair glue and patches for small damaged areas and replace leaking air valves.
Common Installation Errors and How to Avoid Them
Positioning Errors
Positioning errors can render the pneumatic fender ineffective:
- Ensure correct positioning: Use a level and measuring tools to precisely mark the installation position.
- Consequences of improper positioning: The fender may not effectively absorb impact, increasing the risk of damage.
Insufficient Inflation
Proper inflation is crucial for the fender’s functionality:
- Importance of inflation: Insufficient inflation leads to poor cushioning, while over-inflation risks bursting the fender.
- How to measure and maintain correct pressure: Use a pressure gauge to ensure inflation within the recommended range.
Inadequate Securing
Appropriate securing methods must be used when installing pneumatic fenders:
- Chain securing: Suitable for large fenders, providing strong fixation.
- Rope securing: Ideal for medium and small fenders, offering flexibility.
- Steel cable securing: Best for heavy-duty environments, with high strength and durability.
Conclusion
By ensuring correct positioning, inflation, and secure installation, you can avoid common installation errors and significantly enhance the performance and safety of pneumatic fenders. As a leading Pneumatic Fenders manufacturer, Henger understands the importance of regular inspections and maintenance to ensure long-term effectiveness. We are committed to providing professional installation and maintenance advice, ensuring your ships and docks are always well-protected. For those seeking quality and reliability, consider exploring the top pneumatic fender manufacturer to find the best options available.
FAQ
Installation typically takes a few hours, depending on the size and number of fenders.
Basic tools include wrenches, chains, ropes, air pumps, and safety equipment.
While self-installation is possible, having at least one other person assist is recommended for safety and efficiency.
They should be inspected every few months, with more frequent checks in harsh marine conditions.
Minor damage can usually be repaired, but severely damaged fenders should be replaced to ensure effectiveness.
Under normal maintenance conditions, high-quality pneumatic fenders can typically be used for 10-15 years.